Check your compatibility
The wiring of the chime module is a crucial part of the installation of your Smart Video Doorbell.
This chime module allows the Doorbell be sufficiently powered without making the chime ring continuously. If the chime module is not wired correctly the Doorbell won't receive enough power from the transformer and will disconnect frequently.
The chime module needs to be wired in parallel of your chime, be careful not to wire your chime module in parallel of your transformer or your doorbell button.
This article will help you determine where to plug the two wires of your chime module, depending on your chime configuration.
Standard Chime
A standard chime needs two wires to be powered. One wire is coming from the transformer, the other from the doorbell button. In the next examples you can see these two wires, on which you will need to attach the chime module wires.
Examples of chime module wired on standard chimes:

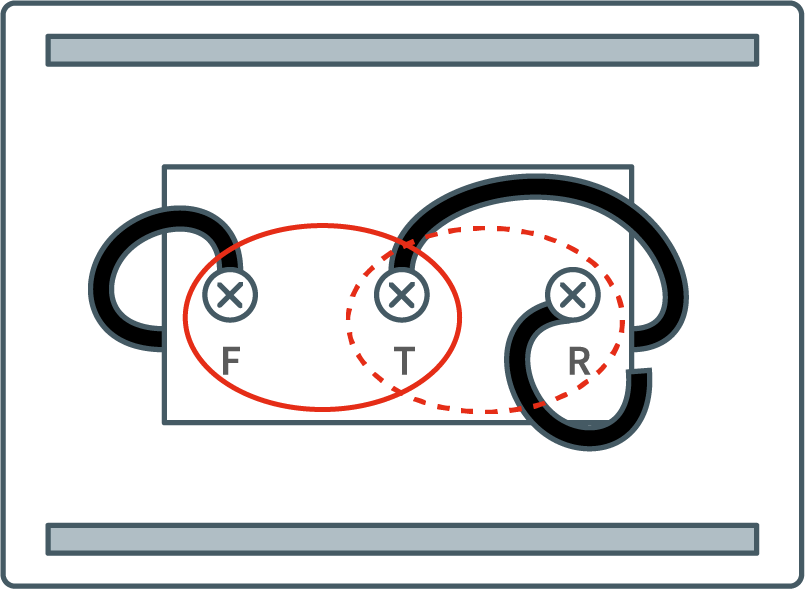
Chime with two doorbells buttons
A standard chime can sometimes support two doorbell buttons, one for the front door and one for the rear door. Therefore there will be a third wire connected to the chime. Depending on the door on which your Smart Video Doorbell is installed, you will have to attach the wires of your chime module to the transformer wire and the front or rear doorbell button wire.
Chime with an internal transformer
Some chimes are equipped with an internal transformer, converting the 220V coming from the mains into an 8V circuit for the doorbell. Your chime has four wires connected to it, two from the mains going inside the internal transformer and the other two coming from the doorbell button.
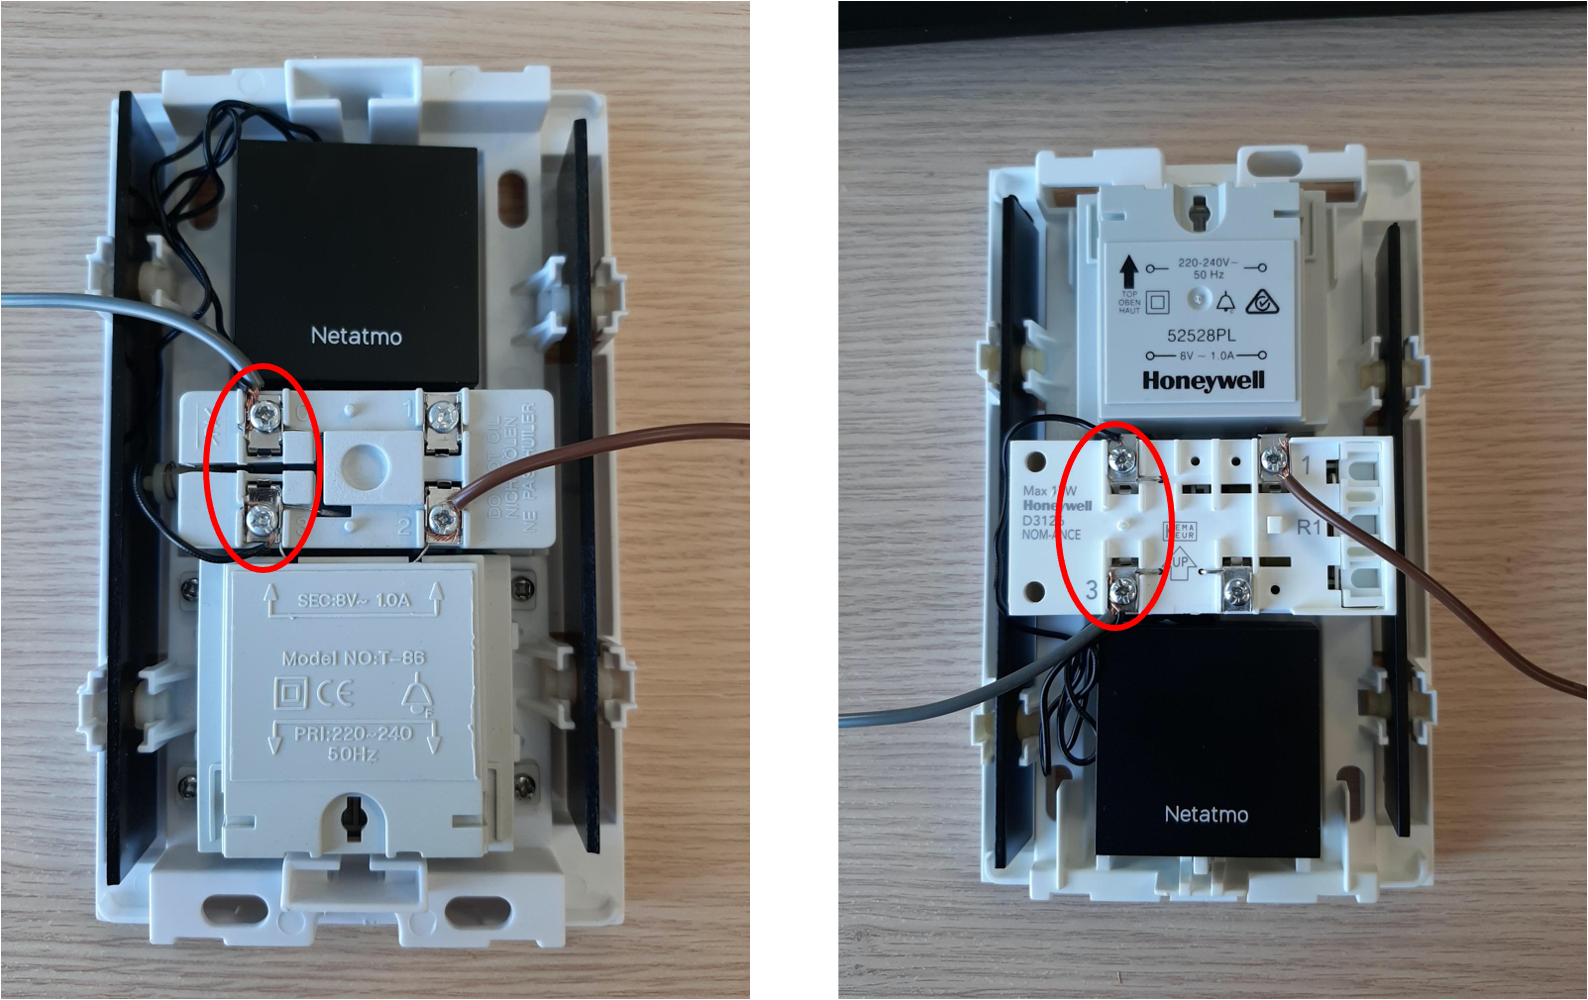
In this case one of the wires of the chime module should be attached to the empty output terminal of the transformer and the other one should be attached to the doorbell button wire following the examples below.
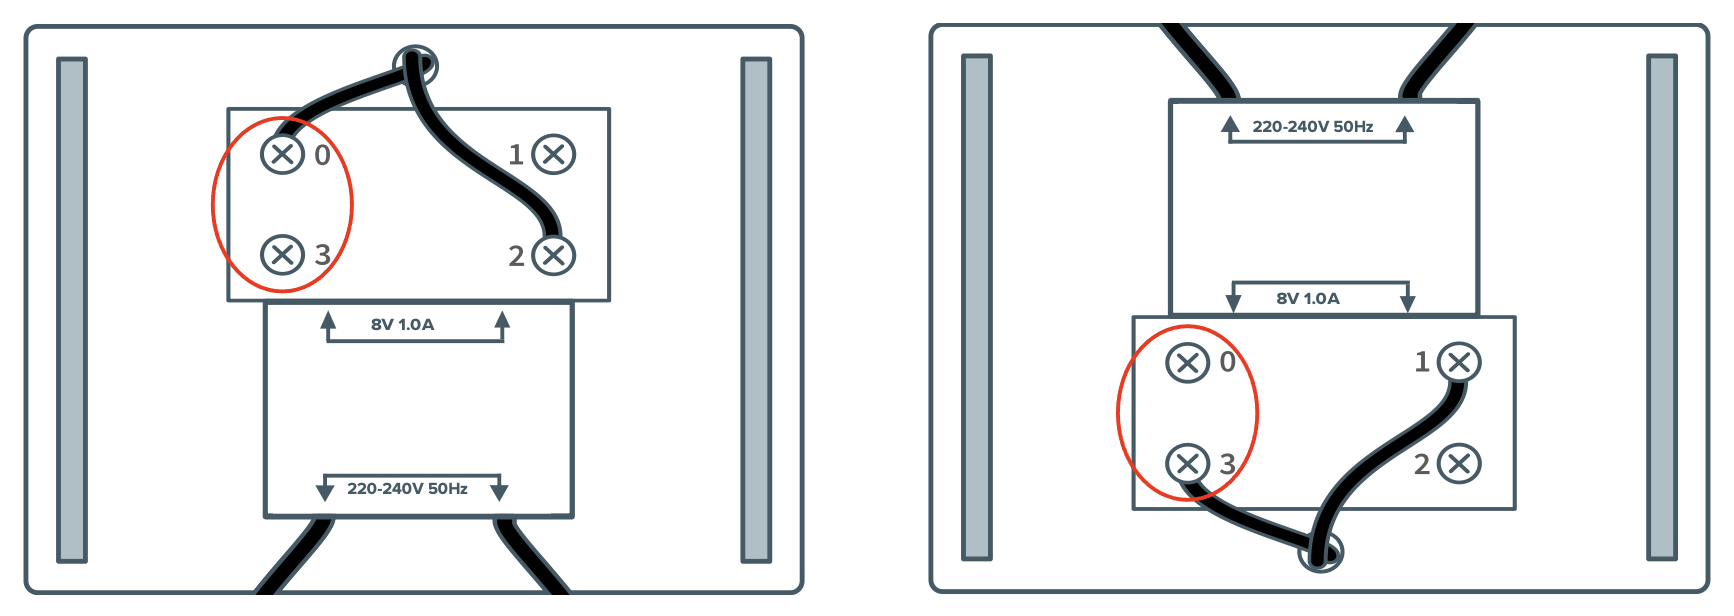
Examples of chime module wired on chimes with internal transformer:
Digital chimes
The wiring of digital chimes is different from standard chimes. Usually a digital chime will have a terminal bloc, with 2 terminals for power, and several terminals for doorbell buttons, like the example below.
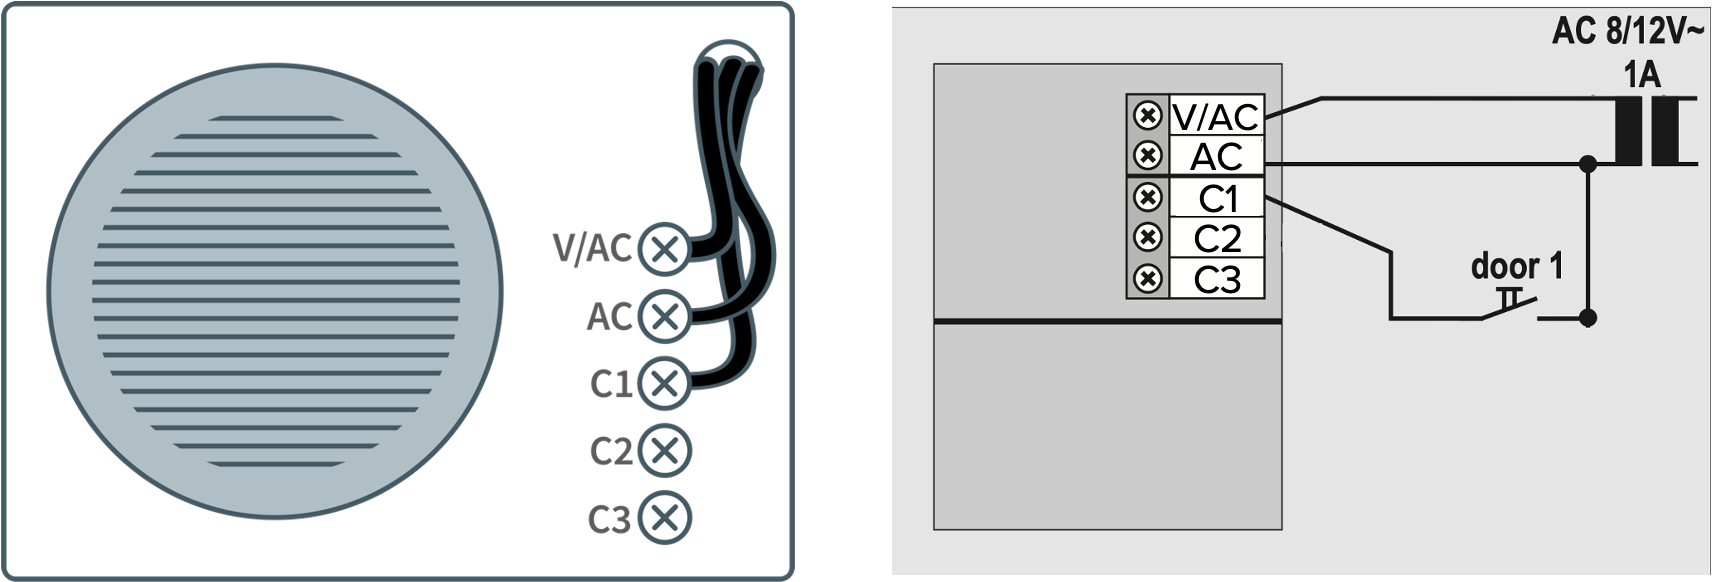
To wire the chime module and the Smart Video Doorbell on a digital chime you will have to follow this electrical wiring:
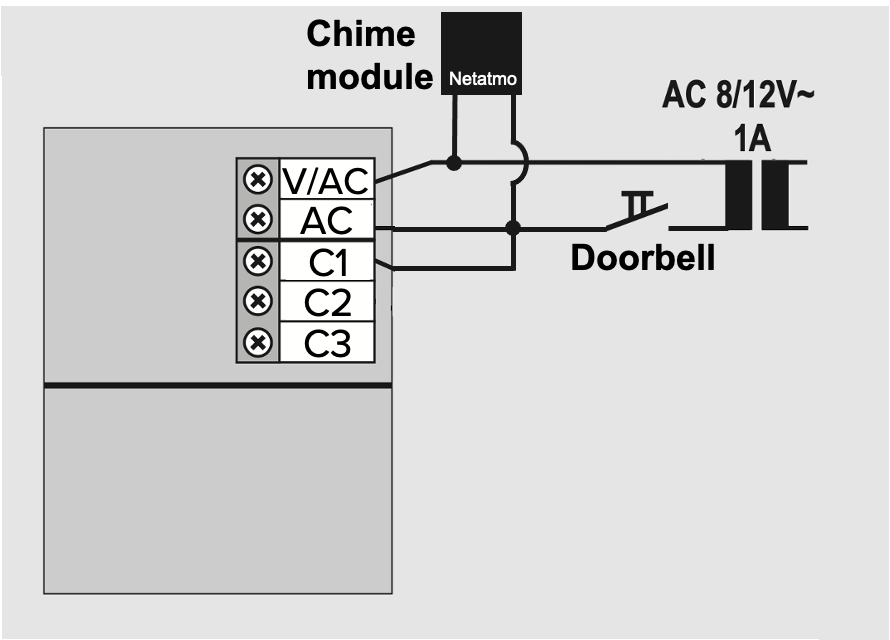
Wagos or splice connectors are strongly suggested to make sure the wires are in contact.
Note: Remove all existing batteries from your digital chime in order to power the Doorbell correctly.
Once your Doorbell is configured, you may have to change the melody duration of your chime as explained in this article.
Wiring Schematics
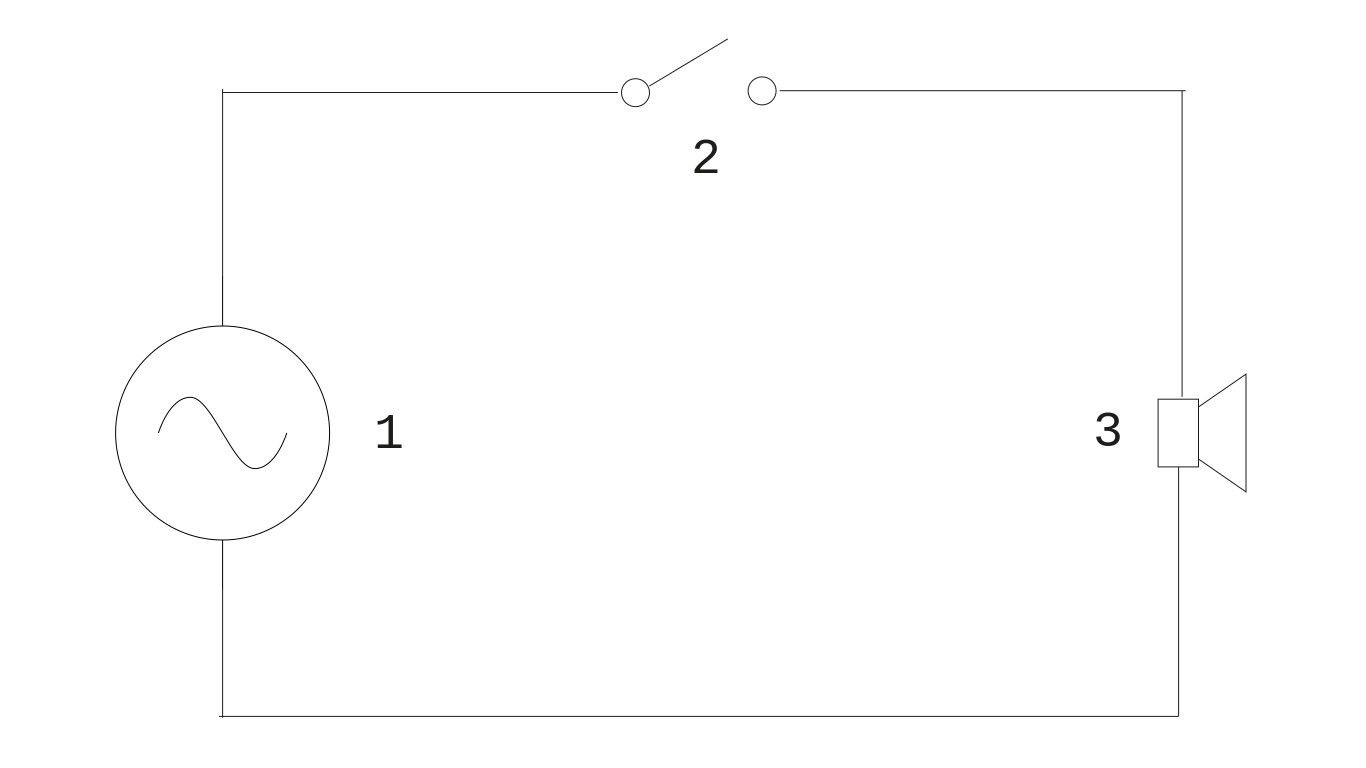
A. Classical doorbell wiring
- Power
- Doorbell button
- Chime
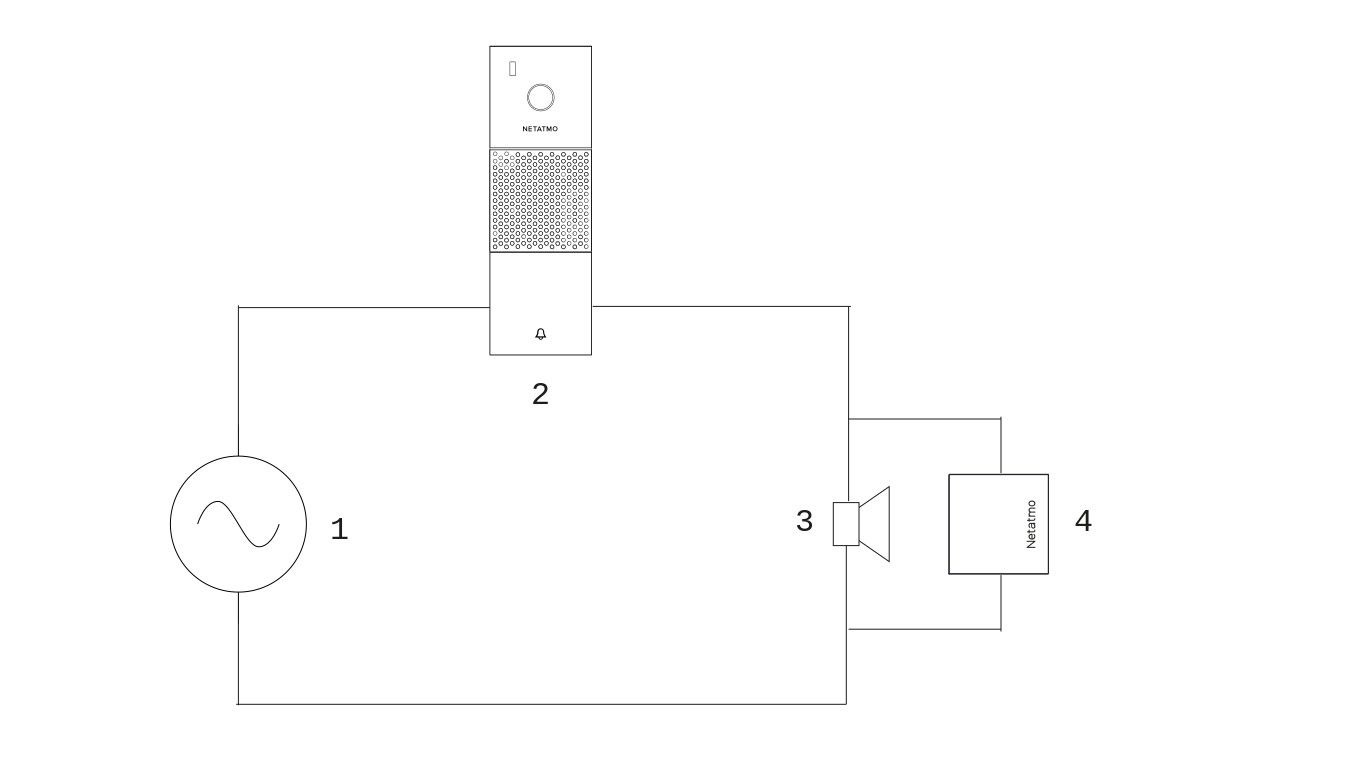
B. Doorbell wiring with the Smart Video Doorbell
Note : The Smart Video Doorbell replaces your old doorbell button, and the chime module is plugged in parallel to your existing chime.
- Power
- Smart Video Doorbell
- Chime
- Chime Module
In order for our technical team to help you in the best way, please send us with your message also the following information:
- a picture of your transformer
- a photo showing the wiring of the Chime Module in your chime
- a photo showing the position of the Chime Module
- the reference of your chime if available
Updated
